wazuh agent as a docker image
one problem I have faced is having different SIEMS monitoring one host device for instance you need different logs from one endpoint device

one problem I have faced is having different SIEMS monitoring one host device for instance you need different logs from one endpoint device. Having all the agents running on that device could lead to resource contention and potential conflicts. One way around this is have one agent run as a docker container and map the host directories to the docker container directories. In this guide I will be running the wazuh agent in a docker container. For Demo purposes. Both the wazuh manager are deployed in local VM.
PREREQUISITES
I am assuming you already have your wazuh manager running and ready to connect to the agent.

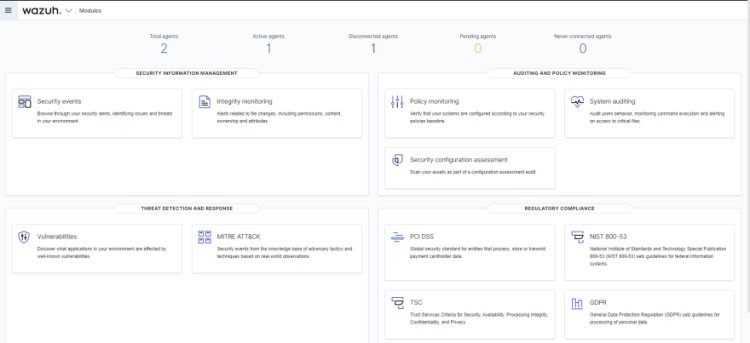
PROCEDURE
In this guide, my wazuh manager is using the IP address 10.0.2.16 while the agent IP is agent47: 10.0.2.15
First step is to install docker on the agent
sudo apt update
sudo apt install apt-transport-https curl gnupg-agent ca-certificates software-properties-common -y
curl -fsSL https://download.docker.com/linux/ubuntu/gpg | sudo apt-key add -
sudo add-apt-repository "deb [arch=amd64] https://download.docker.com/linux/ubuntu focal stable"
sudo apt install docker-ce docker-ce-cli containerd.io -y
sudo usermod -aG docker $USER
newgrp docker
check the docker versiondocker version
Ensure docker is runningsudo systemctl status docker
If docker is not running for some reason, run the following commands.
sudo systemctl start docker
sudo systemctl enable docker
sudo systemctl restart docker
Now that docker is installed. The next step is to get the image from docker hub.
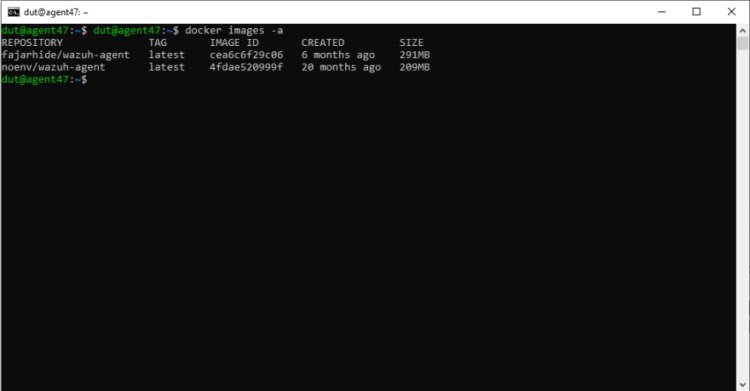
One of the challenges I faced was getting the right image. I tried working with noenv but for some reason could not make it work. Shout out to fajarhide for deploying the centos image that worked for me. To pull the image:docker pull fajarhide/wazuh-agent
To check the image pulled:docker images -a

Running the docker image
Now this is the part that got me scratching my head the most.
How well your image will run is determined by the tags you use in this one command
docker run --network host --env WAZUH_MANAGER_IP='10.0.2.16' -e WAZUH_MANAGER_PORT=1514 -e WAZUH_REGISTRATION_PASSWORD=admin --add-host=agent47:'10.0.2.15' --name wazuh-agent -v /var/log/syslog:/var/log/syslog -v /var/log/auth.log:/var/log/auth.log -v /var/log/dpkg.log:/var/log/dpkg.log -v /var/run/docker.sock:/var/run/docker.sock:ro -v /etc/localtime:/etc/localtime:ro -v /etc/timezone:/etc/timezone:ro fajarhide/wazuh-agent
--network host this line will enable the image to take the current network interface being used by your device
-v tag this tag is very important. it's used to map various directories you want to scan from to the directories in the docker image.
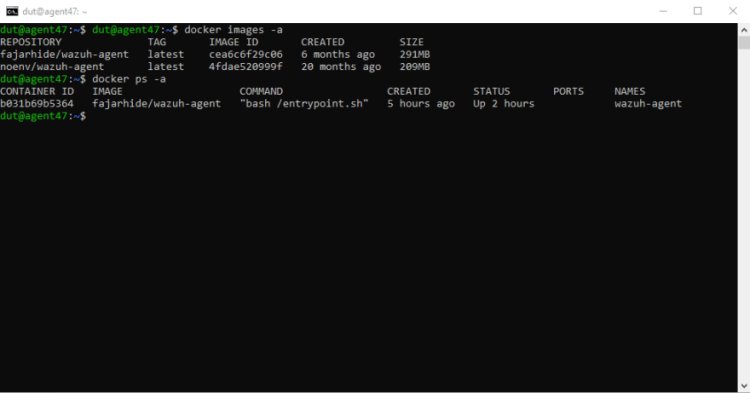
check that the docker image is running
docker ps -a
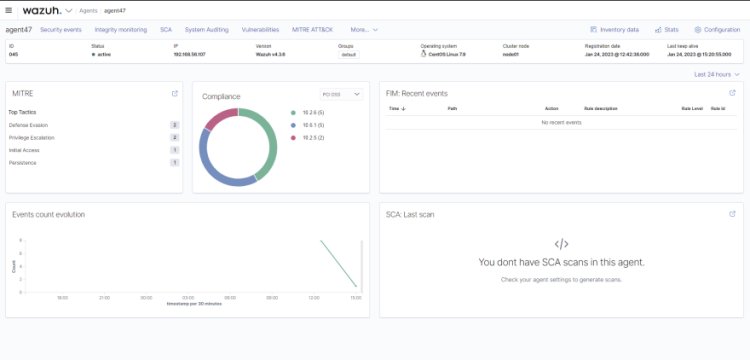
When you navigate to agents tag of your wazuh manager, you'll see that your agent is connected.
The final step is to configure ossec.conf to scan varies directories. You can add as many configurations as you want based on what you want to scan i.e vulnerabilities, file integrity etc.
To access the image, you'll need the image ID shown above
docker exec -it b031b69b5364 /bin/bash
You will need to install an editor either vim or nano depending on which works best for you.
yum update -y
yum install vim
yum install nano
vim /var/ossec/etc/ossec.conf
edit the ossec.conf file and configure it according to your needs.
This is the minimal configurations I used
<ossec_config>
  <client>
    <server>
      <address>10.0.2.16</address>
      <port>1514</port>
      <protocol>tcp</protocol>
    </server>
    <config-profile>centos, centos7, centos7.9</config-profile>
    <notify_time>10</notify_time>
    <time-reconnect>60</time-reconnect>
    <auto_restart>yes</auto_restart>
    <crypto_method>aes</crypto_method>
  </client>

  <client_buffer>
    <!-- Agent buffer options -->
    <disabled>no</disabled>
    <queue_size>5000</queue_size>
    <events_per_second>500</events_per_second>
  </client_buffer>
<!-- Policy monitoring -->
<rootcheck>
    <disabled>no</disabled>
    <check_files>yes</check_files>
    <check_trojans>yes</check_trojans>
    <check_dev>yes</check_dev>
    <check_sys>yes</check_sys>
    <check_pids>yes</check_pids>
    <check_ports>yes</check_ports>
    <check_if>yes</check_if>

  <!-- Frequency that rootcheck is executed - every 12 hours -->
  <frequency>43200</frequency>

  <rootkit_files>etc/shared/rootkit_files.txt</rootkit_files>
  <rootkit_trojans>etc/shared/rootkit_trojans.txt</rootkit_trojans>

  <skip_nfs>yes</skip_nfs>
</rootcheck>
<syscheck>
   <directories check_all="yes" realtime="yes">/home/dut</directories>
</syscheck>
  <localfile>
    <log_format>syslog</log_format>
    <location>/var/ossec/logs/active-responses.log</location>
  </localfile>

  <localfile>
    <log_format>syslog</log_format>
    <location>/var/log/auth.log</location>
  </localfile>

  <localfile>
    <log_format>syslog</log_format>
    <location>/var/log/syslog</location>
  </localfile>

  <localfile>
    <log_format>syslog</log_format>
    <location>/var/log/dpkg.log</location>
  </localfile>
<global>
<fim_daemon>yes</fim_daemon>
</global>
<sca>
    <enabled>yes</enabled>
    <scan_on_start>yes</scan_on_start>
    <interval>12h</interval>
    <skip_nfs>yes</skip_nfs>
</sca>
<wodle name="syscollector">
   <disabled>no</disabled>
   <interval>1h</interval>
   <os>yes</os>
   <packages>yes</packages>
   <hotfixes>yes</hotfixes>
</wodle>
</ossec_config>
I'm assuming you already know how to work with the ossec.conf file
Save and exit the editor
Exit and restart the container
Now your wazuh manager should be able to show the various security events.
What's Your Reaction?


